InstantDocs

InstantDocs

Customize

Domains & Redirects

Edit the subdomain or custom domain for your Knowledge Base.

TL;DR

1
Access Knowledge Base Settings

Hover over your knowledge base, click the three dots, and select Settings

2
Change InstantDocs subdomain name
Edit the Domains & Redirects in the subdomain field.
3
Add custom domain
Input your custom domain and click Add.
4
Verify domain
Follow the cname instructions for DNS verification.
5
Preview URL
Open Link to view your new custom domain.

Let's Do It Together!

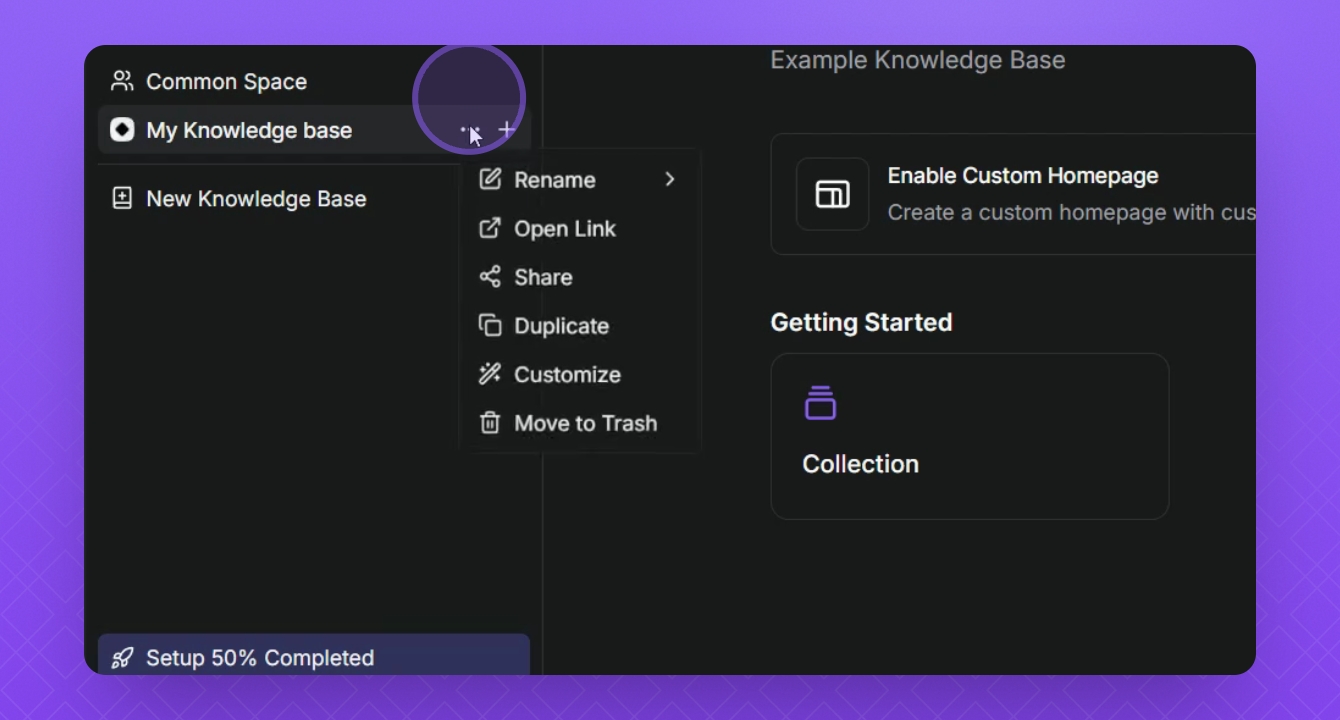
Step 1: Access Knowledge Base Settings

  1. Hover over the Knowledge Base.

  2. Click the three dots.

  3. Select Settings.

Snapshot

Step 2: Change Domain Settings

  1. Click Domains and Redirects in the subdomain field.

  2. Change the name for your Knowledge Base URL.

You will see a temporary link displayed before adding your custom domain.

Snapshot

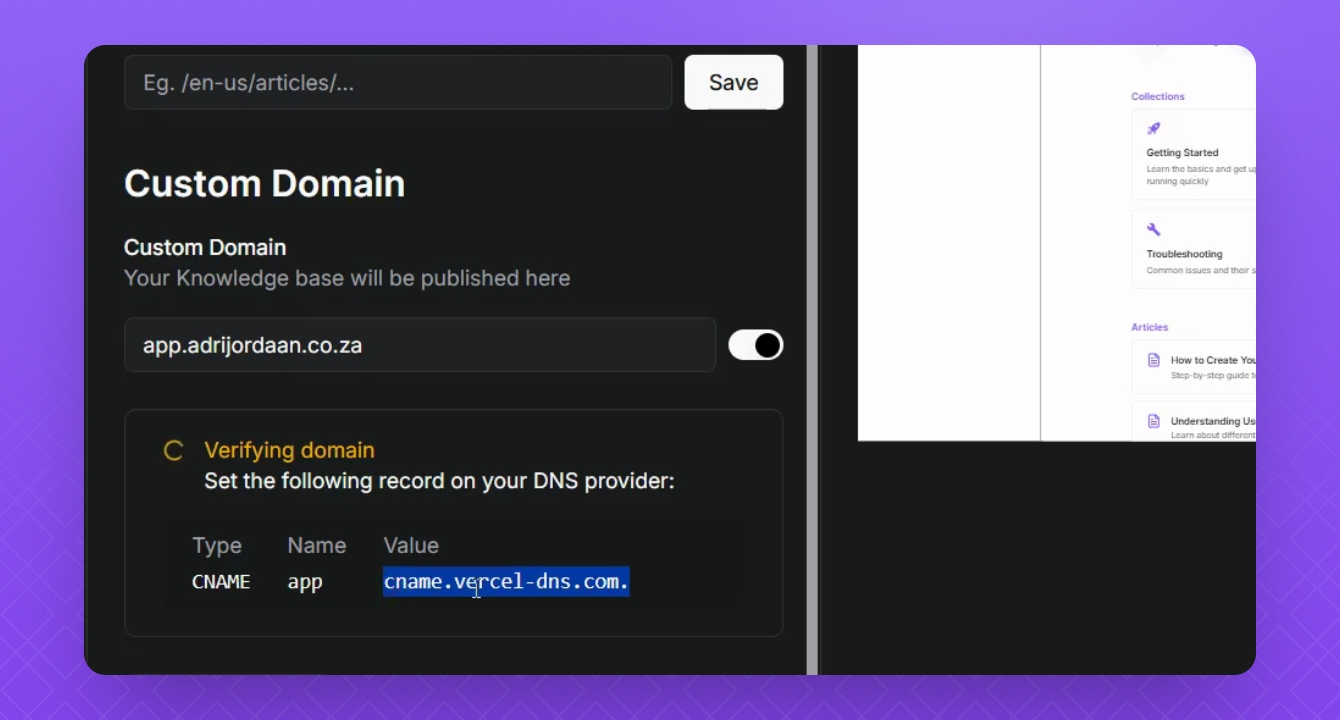
Step 3: Set Up Custom Domain

  1. Locate the Custom Domain section.

  2. Add your custom domain for the Knowledge Base.

  3. Click the Add button.

Snapshot

Step 4: Verify Domain

  1. Instadocs will try to verify the domain.

  2. During verification, note the CNAME value records provided for your DNS provider.

Snapshot

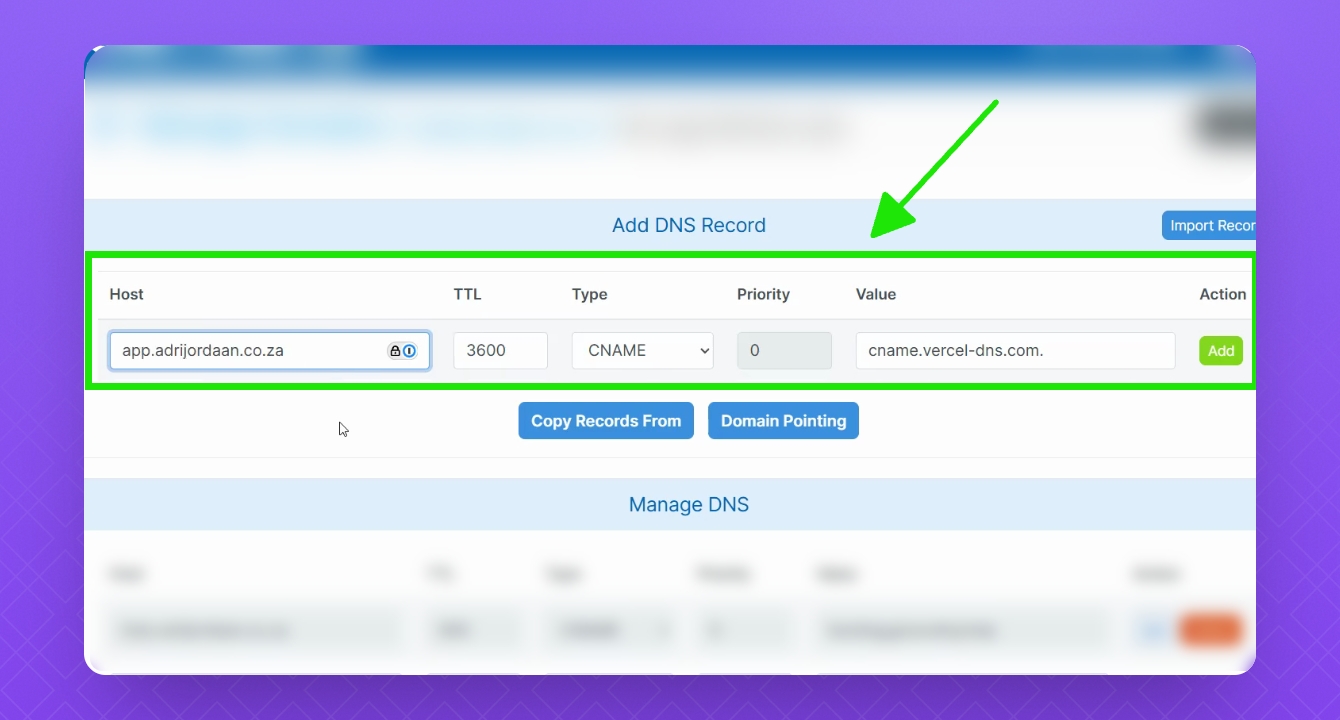
Step 5: Update DNS Settings

  1. Navigate to your DNS platform.

  2. Add the CNAME value in the Value field.

  3. Change the record type to CNAME.

  4. Enter your custom subdomain in the Host Value field.

  5. Save your changes and go back to your Instant Docs account.

NOTE: If your custom subdomain is currently connected to another Knowledge Base platform, please remove those existing DNS records before adding your InstantDocs records. This will help prevent any domain conflicts!
Snapshot

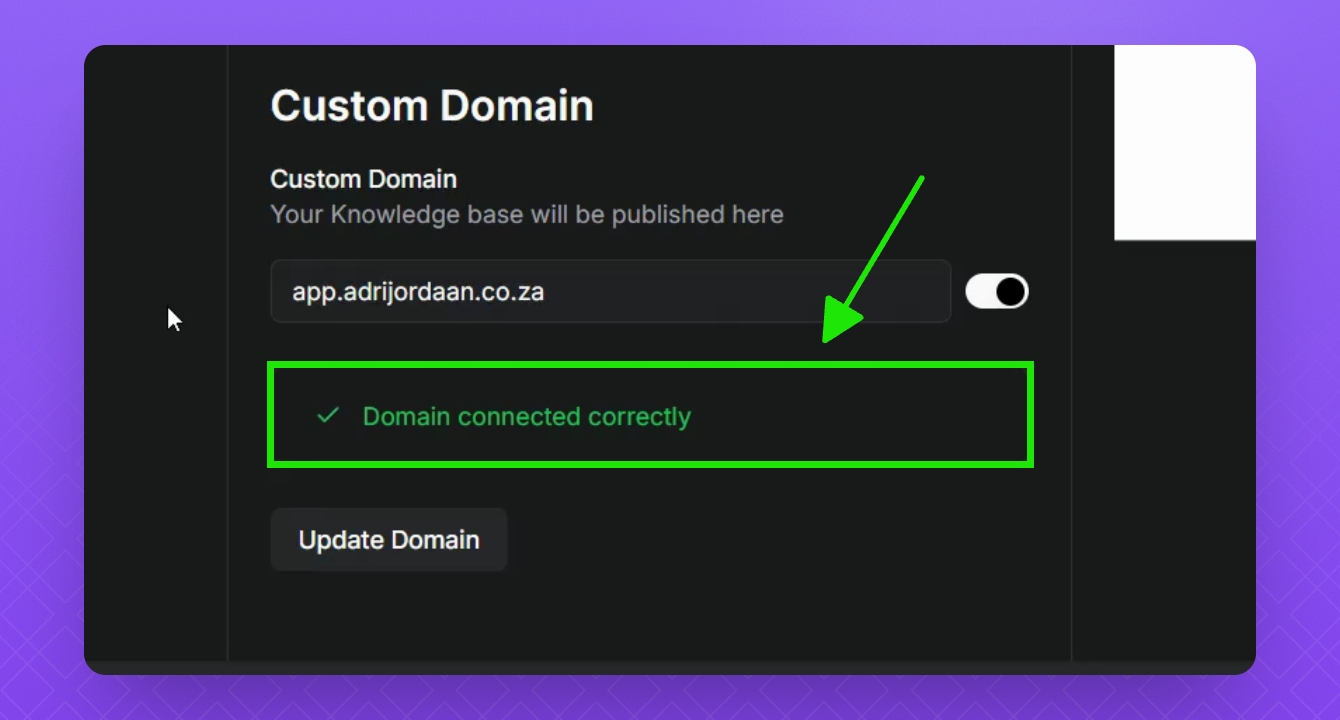
Step 6: Confirm Verification

  1. Wait for Instant Docs to verify your account.

  2. You will see a green check mark if successful.

Snapshot

Step 7: Preview Knowledge Base URL

  1. Head back to your Knowledge Base.

  2. Click the three dots.

  3. Select Open Link at the top URL bar.

  4. Check that your new custom domain is loading with your Knowledge Base.

Snapshot

Troubleshooting

Why is my custom domain not verifying?

DNS propagation depends on your provider. It can take up to 48 hours but usually completes sooner. 

FAQ

How do I update my custom domain or subdomain for the Knowledge Base?
Hover over your Knowledge Base, click the three dots, and select Customize. Then click Domains and Redirects.
How do I change my subdomain?
Enter a new name in the Subdomain field. You can use this URL as your Knowledge Base’s temporary URL before connecting a custom domain.
What is the URL Structure field for?
Add a path segment between your domain and article URL. This reduces input errors and broken links.
How do I connect a custom domain?
- Enter your domain in the Custom Domain field and click Add. - InstantDocs will try to verify your domain and provide you with DNS records to add to your DNS platform. - Copy the CNAME values from InstantDocs, paste them in your DNS provide - Set the record type to CNAME, and use your custom subdomain as the Host. - Save changes, then return to InstantDocs.
How do I know when my custom domain is verified?
Once verified, a green check mark appears in the custom domain field area within your InstantDocs account. Hover over the Knowledge Base, click the three dots, select Open Link, and check the browser URL bar to test if it is working.

Was this page helpful?

Powered by InstantDocs